In order to determine the distance from our camera to a known object or marker, we are going to utilise triangle similarity.
The triangle similarity goes something like this: Let’s say we have a marker or object with a known width W. We then place this marker some distance D from our camera. We take a picture of our object using our camera and then measure the apparent width in pixels P. This allows us to derive the perceived focal length F of our camera:
F = (P x D) / W
For example, let’s say I place a standard piece of 8.5 x 11in piece of paper (horizontally; W = 11) D = 24 inches in front of my camera and take a photo. When I measure the width of the piece of paper in the image, I notice that the perceived width of the paper is P = 248 pixels.
My focal length F is then:
F = (248px x 24in) / 11in = 543.45
As I continue to move my camera both closer and farther away from the object/marker, I can apply the triangle similarity to determine the distance of the object to the camera:
D’ = (W x F) / P
Again, to make this more concrete, let’s say I move my camera 3 ft (or 36 inches) away from my marker and take a photo of the same piece of paper. Through automatic image processing I am able to determine that the perceived width of the piece of paper is now 170 pixels. Plugging this into the equation we now get:
D’ = (11in x 543.45) / 170 = 35in
Or roughly 36 inches, which is 3 feet.
DISTANCE MEASURMENT USING RASPBERRY PI AND OPENCV
Let’s go ahead and get this project started. Open up a new file, name itdistance_to_camera.py , and we’ll get to work.
Finding the distance from your camera to object/marker using Python and OpenCV
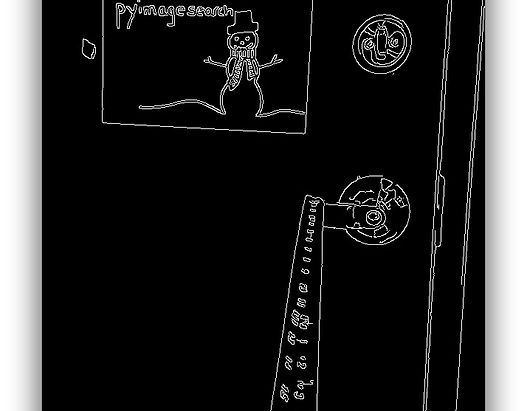
As you can see, the edges of our marker (the piece of paper) have clearly reveled. Now, all we need to do is find the contour (i.e. outline) that represents the piece of paper.
We find our marker by using the cv2.findContours function and then determining the contour with the largest area.
We are making the assumption that the contour with the largest area is our piece of paper. This assumption works for this particular example, but in reality finding the marker in an image is highly application specific.
In our example, simple edge detection and finding the largest contour works well. We could also make this example more robust by applying contour approximation, discarding any contours that do not have 4 points (since a piece of paper is a rectangle and thus has 4 points), and then finding the largest 4-point contour.
Note: More on this methodology can be found in this post on building a kick-ass mobile document scanner.
Other alternatives to finding markers in images are to utilise colour, such that the colour of the marker is substantially different from the rest of the scene in the image. You could also apply methods like keypoint detection, local invariant descriptors, and keypoint matching to find markers; however, these approaches are outside the scope of this article and are again, highly application specific.
Anyway, now that we have the contour that corresponds to our marker, we return the bounding box which contains the (x, y)-coordinates and width and height of the box (in pixels) to the calling function.
Let’s also quickly to define a function that computes the distance to an object using the triangle similarity detailed above:
This function takes a knownWidth of the marker, a computed focalLength, and perceived width of an object in an image (measured in pixels), and applies the triangle similarity detailed above to compute the actual distance to the object.
To see how we utilize these functions, continue reading:
Triangle Similarity for Object/Marker to Camera Distance
def distance_to_camera(knownWidth, focalLength, perWidth):
# compute and return the distance from the maker to the camera
return (knownWidth * focalLength) / perWidth
# import the necessary packages
import numpy as np
import cv2
def find_marker(image):
# convert the image to grayscale, blur it, and detect edges
gray = cv2.cvtColor(image, cv2.COLOR_BGR2GRAY)
gray = cv2.GaussianBlur(gray, (5, 5), 0)
edged = cv2.Canny(gray, 35, 125)
# find the contours in the edged image and keep the largest one;
# we'll assume that this is our piece of paper in the image
(cnts, _) = cv2.findContours(edged.copy(), cv2.RETR_LIST, cv2.CHAIN_APPROX_SIMPLE)
c = max(cnts, key = cv2.contourArea)
# compute the bounding box of the of the paper region and return it
return cv2.minAreaRect(c)
def distance_to_camera(knownWidth, focalLength, perWidth):
# compute and return the distance from the maker to the camera
return (knownWidth * focalLength) / perWidth
# initialize the known distance from the camera to the object, which
# in this case is 24 inches
KNOWN_DISTANCE = 24.0
# initialize the known object width, which in this case, the piece of
# paper is 11 inches wide
KNOWN_WIDTH = 11.0
# initialize the list of images that we'll be using
IMAGE_PATHS = ["images/2ft.png", "images/3ft.png", "images/4ft.png"]
# load the furst image that contains an object that is KNOWN TO BE 2 feet
# from our camera, then find the paper marker in the image, and initialize
# the focal length
image = cv2.imread(IMAGE_PATHS[0])
marker = find_marker(image)
focalLength = (marker[1][0] * KNOWN_DISTANCE) / KNOWN_WIDTH
The first step to finding the distance to an object or marker in an image is to calibrate and compute the focal length. To do this, we need to know:
-
The distance of the camera from an object.
-
The width (in units such as inches, meters, etc.) of this object. Note: The height could also be utilised, but this example simply uses the width.
Let’s also take a second and mention that what we are doing is not true camera calibration. True camera calibration involves the intrinsic parameters of the camera, which you can read more on here.
We initialize our known KNOWN_DISTANCE from the camera to our object to be 24 inches. And we initialize the KNOWN_WIDTH of the object to be 11 inches (i.e. a standard 8.5 x 11-inch piece of paper laid out horizontally).
We then define the paths to our images.
The next step is important: it’s our simple calibration step.
We load the first image off disk — we’ll be using this image as our calibration image.
Once the image is loaded, we find the piece of paper in the image, and then compute our focalLength using the triangle similarity.
Now that we have “calibrated” our system and have the focalLength, we can compute the distance from our camera to our marker in subsequent images quite easily.
Let’s see how this is done:
# import the necessary packages
import numpy as np
import cv2
def find_marker(image):
# convert the image to grayscale, blur it, and detect edges
gray = cv2.cvtColor(image, cv2.COLOR_BGR2GRAY)
gray = cv2.GaussianBlur(gray, (5, 5), 0)
edged = cv2.Canny(gray, 35, 125)
# find the contours in the edged image and keep the largest one;
# we'll assume that this is our piece of paper in the image
(cnts, _) = cv2.findContours(edged.copy(), cv2.RETR_LIST, cv2.CHAIN_APPROX_SIMPLE)
c = max(cnts, key = cv2.contourArea)
# compute the bounding box of the of the paper region and return it
return cv2.minAreaRect(c)
The first thing we’ll do is import our necessary packages. We’ll use NumPy for numerical processing and cv2 for our OpenCV bindings.
From there we define our find_marker function. This function accepts a single argument, image, and is meant to be utilised to find the object we want to compute the distance.
In this case, we are using a standard piece of 8.5 x 11-inch piece of paper as our marker.
Our first task is to now find this piece of paper in the image. To to do this, we’ll convert the image to grayscale, blur it slightly to remove high-frequency noise and apply edge detection.
After applying these steps our image should look something like this:
# loop over the images
for imagePath in IMAGE_PATHS:
# load the image, find the marker in the image, then compute the
# distance to the marker from the camera
image = cv2.imread(imagePath)
marker = find_marker(image)
inches = distance_to_camera(KNOWN_WIDTH, focalLength, marker[1][0])
# draw a bounding box around the image and display it
box = np.int0(cv2.cv.BoxPoints(marker))
cv2.drawContours(image, [box], -1, (0, 255, 0), 2)
cv2.putText(image, "%.2fft" % (inches / 12),
(image.shape[1] - 200, image.shape[0] - 20), cv2.FONT_HERSHEY_SIMPLEX,2.0, (0, 255, 0), 3)
cv2.imshow("image", image)
cv2.waitKey(0)
We start looping over our image paths.
Then, for each image in the list, we load the image of a disk, find the marker in the image, and then compute the distance of the object to the camera.
From there, we simply draw the bounding box around our marker and display the distance.
Results
To see our script in action, open up a terminal, navigate to your code directory, and execute the following command:
$ python distance_to_camera.py
If all goes well you should first see the results of 2ft.png , which is the image we use to “calibrate” our system and compute our initial focalLength

From the above image, we can see that our focal length is properly determined and the distance to the piece of paper is 2 feet, per the KNOWN_DISTANCE and KNOWN_WIDTH variables in the code.
Now that we have our focal length, we can compute the distance to our marker in subsequent images:
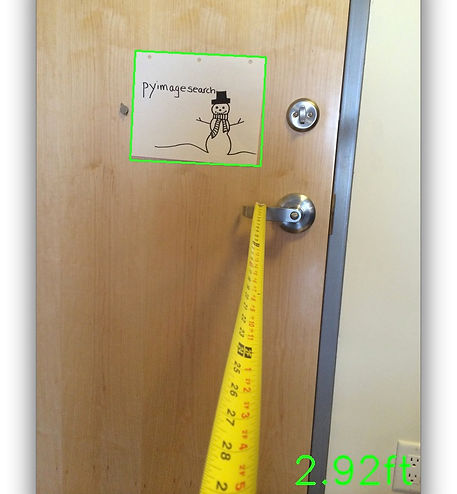
In above example, our camera is now approximate 3 feet from the marker.
That all said, the triangle similarity approach detailed in this article will still work and allow you to find the distance from an object or marker in an image to your camera.
Summary
To accomplish this task we utilised the triangle similarity, which requires us to know two important parameters prior to applying our algorithm:
-
The width (or height) in some distance measure, such as inches or meters, of the object we are using as a marker.
-
The distance (in inches or meters) of the camera to the marker in step 1.
-
Computer vision and image processing algorithms can then be used to automatically determine the perceived width/height of the object in pixels and complete the triangle similarity and give us our focal length.
Then, in subsequent images, we simply need to find our marker/object and utilise the computed focal length to determine the distance to the object from the camera.
For the real-time distance measurement you need do some more tweak. For the source code, please check the Github